
Chinese and English sources are V1.2.3. All production methods, tool steps and troubleshooting are retained. Source scope: RK3326/RK3399/RK3368/RK3288 with Linux 4.4/4.19; RK3328 additionally lists Linux 3.10. ArmSoM platform reference only: verify the board, SDK/BSP, loader, tool version and storage device. No flashing, erasure, power-cycle operations or hardware tests were performed.
Flashing, creating upgrade media and erasing Flash overwrite existing data. Back up and verify the target, loader, image and power supply; do not run examples directly on production devices.
Chinese uses Chinese figures; EN/RU/DE use corresponding English figures. The Chinese Prepare IDB failure section has two images, combined into one in English; each source layout is retained. Screenshot commands are also transcribed as copyable source examples.
1. Production flashing methods
1.1 USB upgrade
- Create update.img upgrade firmware.
- Flash devices in batches with FactoryTool.
1.2 SD upgrade
- Create update.img.
- Create a firmware-upgrade SD card with SD_Firmware_Tool.
- Insert the card and cycle power to flash the firmware.
1.3 Programmer upgrade
- Create update.img.
- Use SpiImageTool to create programmer files.
- Connect the storage chip to the programmer and flash it.
2. Tool usage
2.1 FactoryTool batch flashing
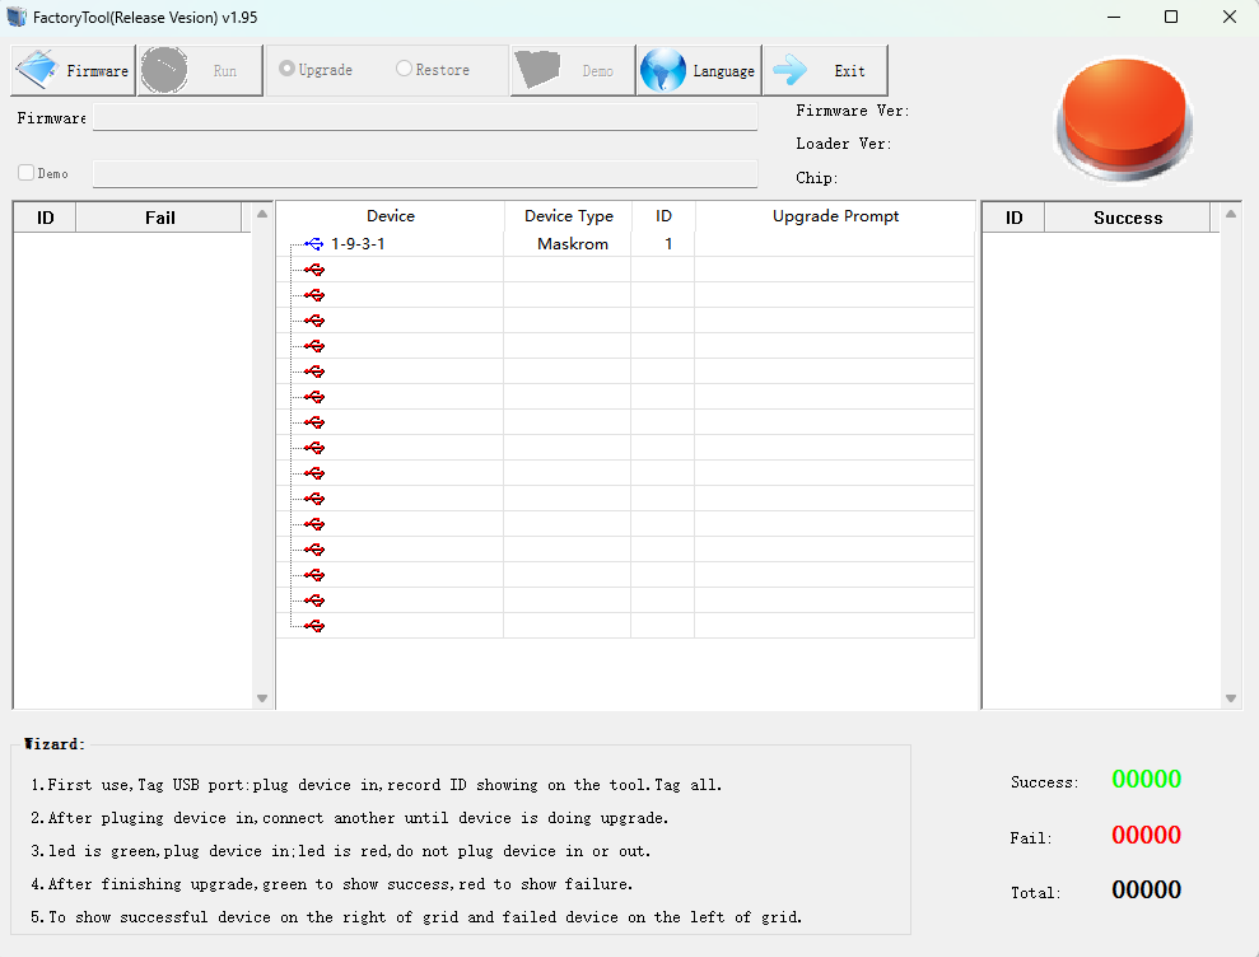
English-source tool screenshot
Usage:
- Click Firmware and select upgrade firmware.
- Optionally check Demo and select a Demo image; see OemTool below for image creation.
- Click Start to detect upgrade devices automatically.
- Connect the devices; flashing starts automatically when detected.
2.2 OemTool: Demo image creation
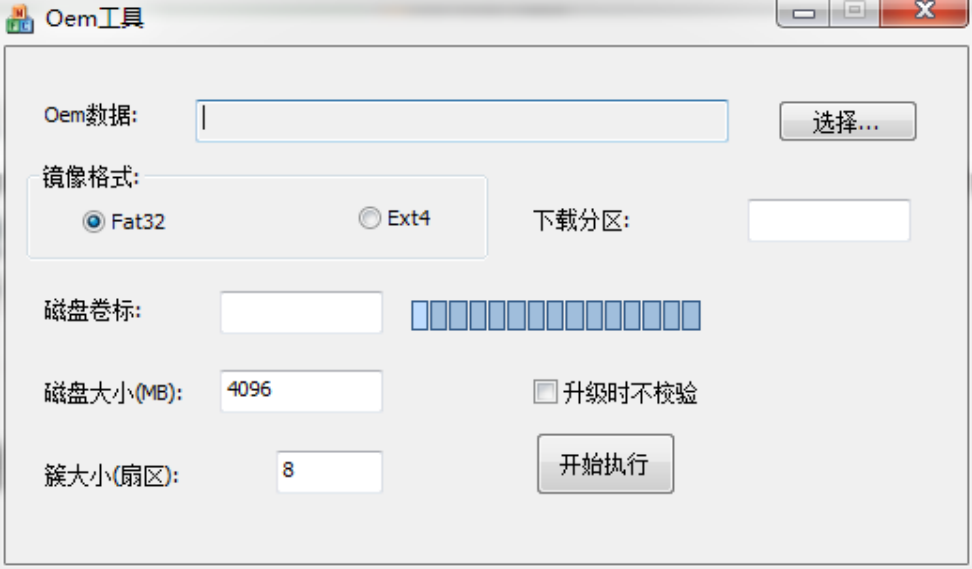
English-source tool screenshot
Demo image creation steps:
-
Click Select… and choose the Demo directory.
-
Check Fat32; currently only Fat32 images are supported.
-
Set Disk Size larger than the user partition capacity, aligned to 100M.
-
Click Start; after success, OemImage.img appears in the tool directory.
2.3 SD_Firmware_Tool: SD upgrade cards
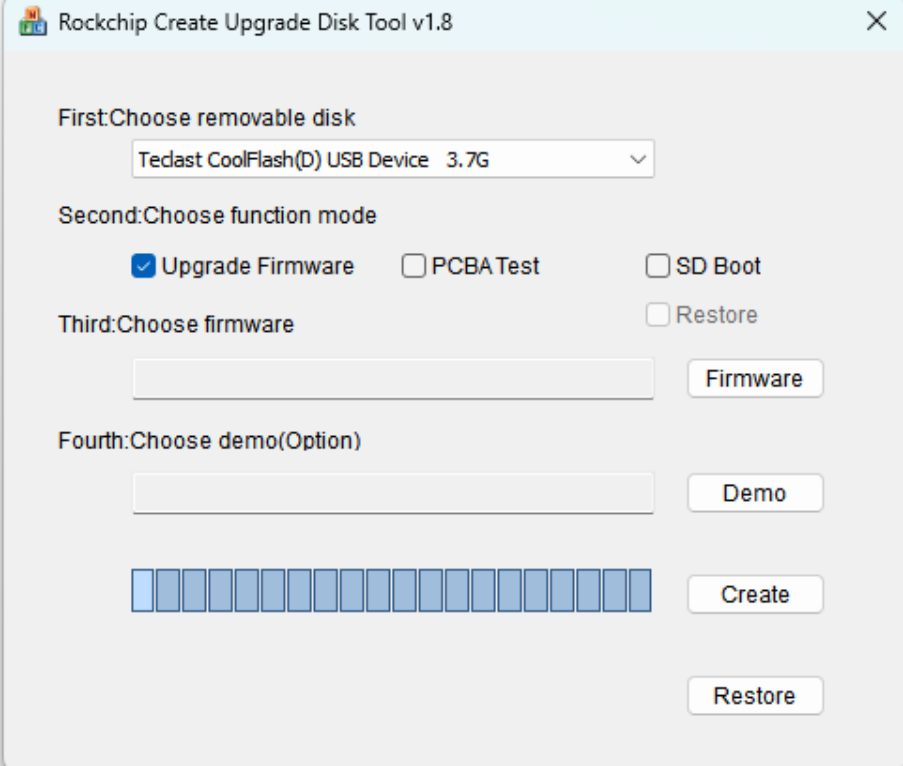
English-source tool screenshot
SD upgrade card creation:
-
Select the target SD card or USB drive from the dropdown.
-
Check Firmware Upgrade.
-
Click Select Firmware and choose update.img.
-
Click Create.
2.4 SpiImageTool: programmer images
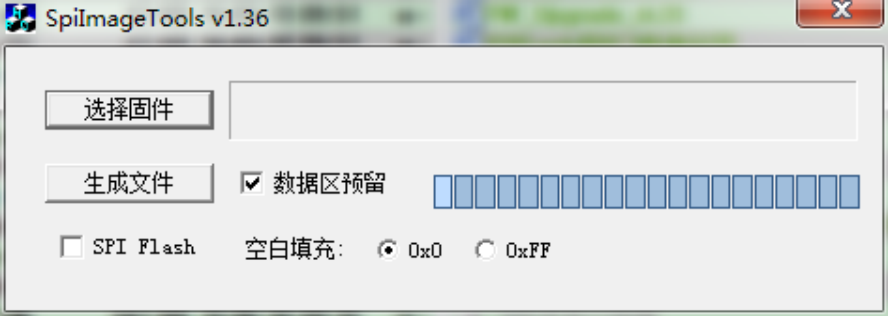
English-source tool screenshot
Programmer image creation:
-
Click Select Firmware and choose update.img.
-
For Emmc storage, check Reserve Data Area.
-
Select blank fill 0 for Emmc, or 0xFF for nandflash.
-
Click Generate File. On success, boot0.bin and data.bin appear in the tool directory. Emmc uses only data.bin; nandflash requires both boot0.bin and data.bin.
3. Create upgrade firmware
3.1 Steps
-
In the Android source directory, run mkimage.sh with the ota argument to generate system.img, boot.img, recovery.img and other files. Copy them into rockdev/image.
-
In AndroidTool/rockdev, run mkupdate.bat to generate update.img; on Ubuntu run mkupdate.sh. The screenshot shows mkupdate.bat:

English-source tool screenshot
Afptool -pack ./ Image\update.img
RKImageMaker.exe -RK31 RK3188Loader(L)_V2.10.bin Image\update.img update.img -os_type:androidos
Pay particular attention to -RK31: it must match the device. If unknown, open AndroidTool, enter Advanced Functions, select the platform loader file and click Download.
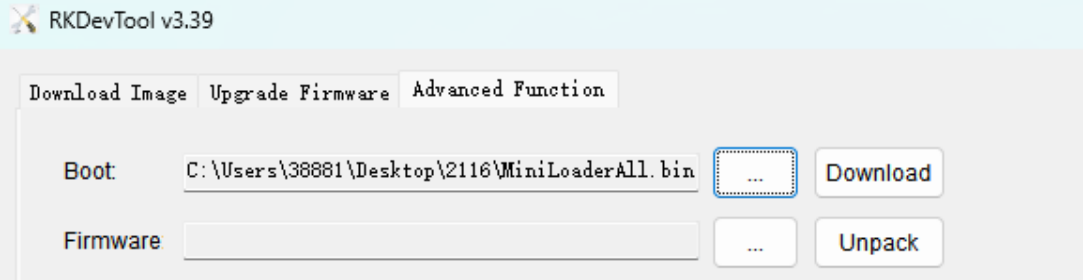
English-source tool screenshot
Click Read Chip Info below. The information appears on the right; Image Chip Flag is the required parameter.
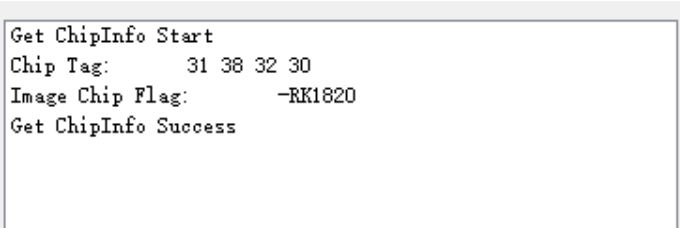
English-source tool screenshot
4. Programmer configuration
4.1 EMMC programming data
EMMC has USER, BOOT1 and BOOT2 areas. Only USER needs programming, using data.bin generated by SpiImageTool.
4.2 EMMC EXT_CSD settings
Use all default values; no configuration is required.
EXT_CSD[167] = 0x1f(默认值)

EXT_CSD[162] = 0x0 (默认值)

EXT_CSD[177] = 0x0 (默认值)

EXT_CSD[178] = 0x0 (默认值)

EXT_CSD[179] = 0x0 (默认值)
5. Common upgrade problems
5.1 Download Boot failure: case 1
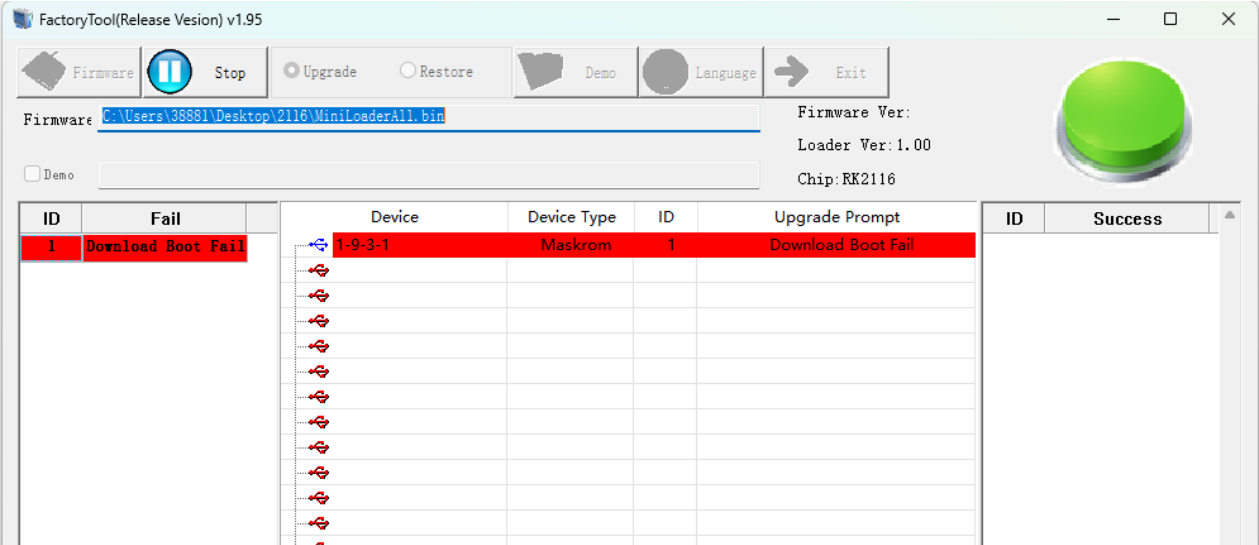
English-source tool screenshot
Log message:

English-source tool screenshot
Possible causes:
-
Poor USB signal: check USB-line capacitor/resistor values and USB power.
-
Poor solder joints on the controller or a power-supply problem.
5.2 Download Boot failure: case 2
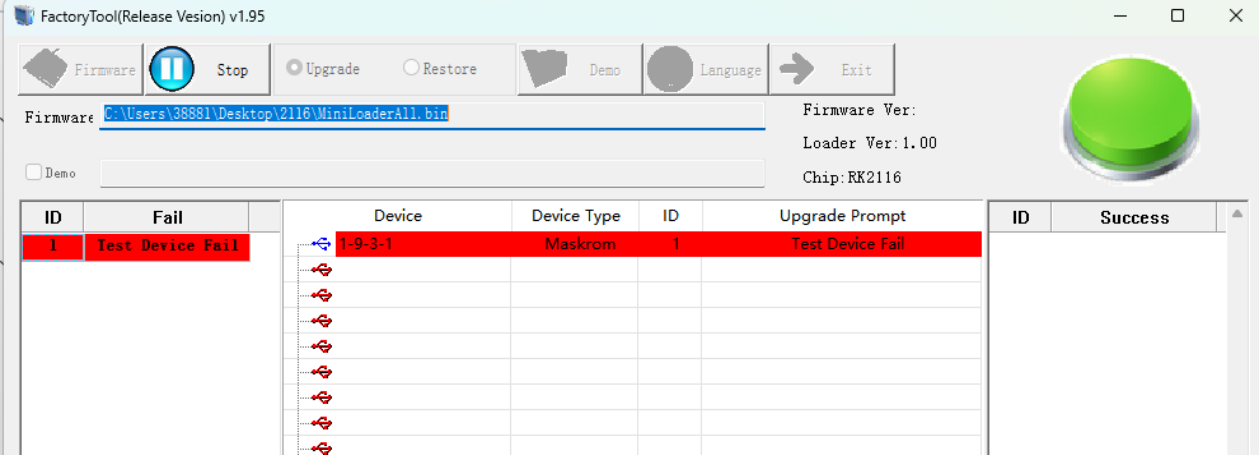
English-source tool screenshot
Possible cause: DDR components or routing.
5.3 Prepare IDB failure
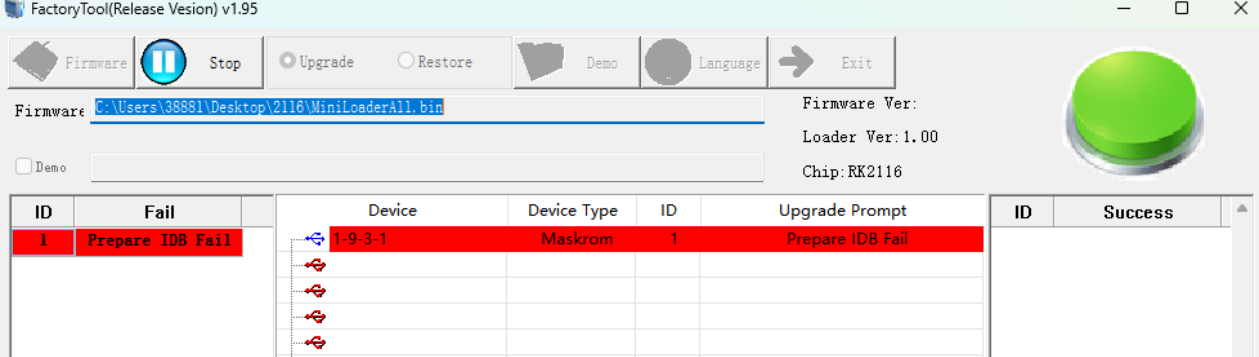
English-source tool screenshot
Possible cause: poor Flash solder joints or an unsupported chip.
5.4 Download IDB failure
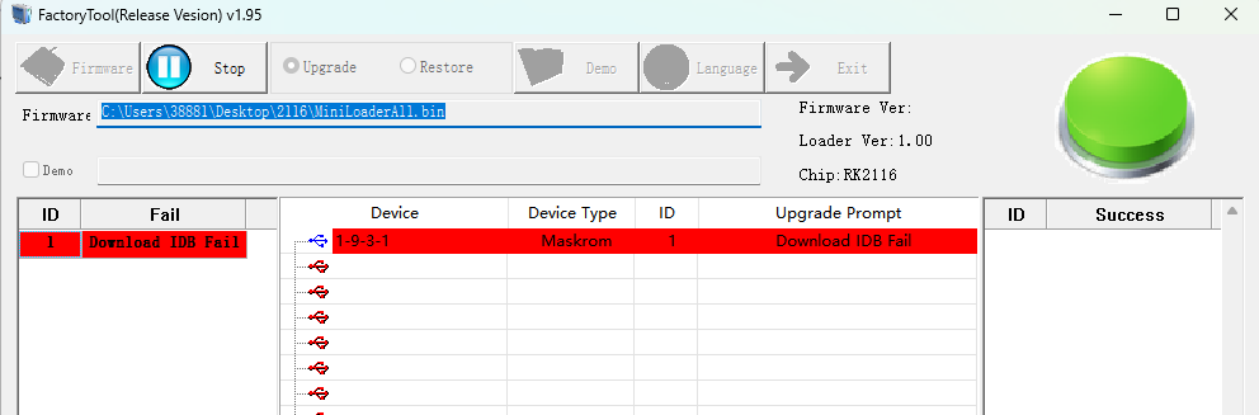
English-source tool screenshot
Possible causes:
-
USB communication problem: power-cycle and retry; use a powered USB hub.
-
DDR stability problem: run stability tests with the DDR test tool.
5.5 Firmware download failure
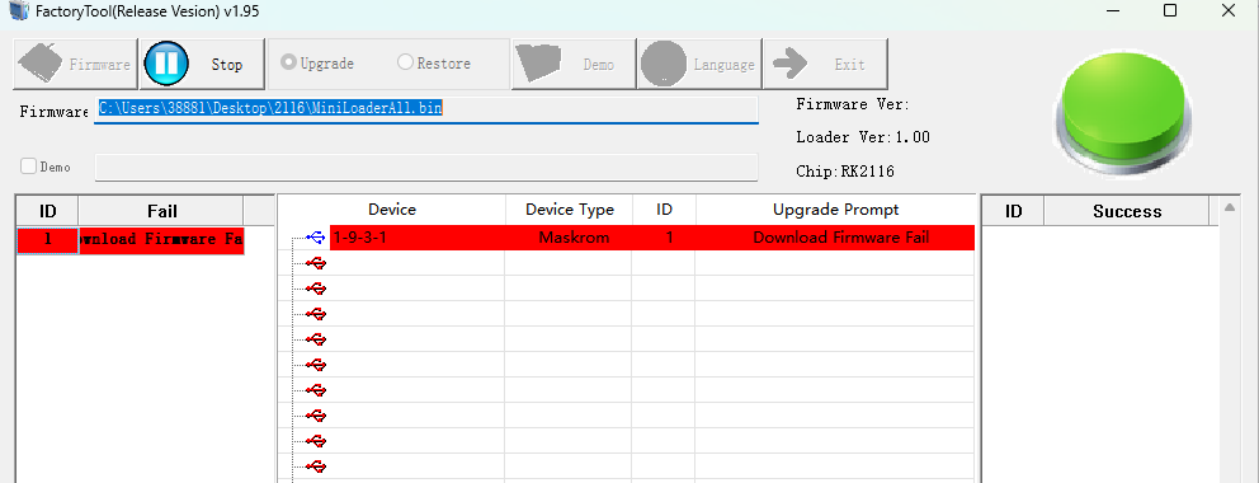
English-source tool screenshot
Possible causes:
-
USB communication problem: power-cycle and retry; use a powered USB hub.
-
Flash problem: erase Flash with AndroidTool and retry.